Grounding Doodle
This is a grounding prompt that is helpful when a break from thinking or feeling is needed. Sometimes a distraction from the constant spin and pain is what our bodies need.


You don’t need any fancy supplies for this prompt. In the top image I used a pen and in the image directly above I used pencil and a marker. You don’t need much at all to make this prompt happen, so if you’re at work or in a meeting or somewhere in public, this is an accessible prompt to make.
**This is not in our audio…however is another version of this prompt that doesn’t really need directions or walking step by step through it unless you’re teaching it to a kid they may need some help. This is a great one for kids below. I wanted to put this here incase it’s helpful to anyone. It’s fairly simple, you’d just make lines from one side to the other in various places and they will cross over one another and then you doodle different designs of your choice in the spaces. You can use any medium you’d like. I used acrylic paint pens for this one).

Reminders:
Before getting started remember to be gentle with yourself, before, during and after creating. It is difficult while grieving to try something new. Even without living with grief, creating can be a very vulnerable thing to do, so please keep this in mind and go easy on you as you proceed.
I highly encourage you to name your inner critic before getting started. Often when we create our inner critics creep out and get loud. If we name our inner critic - it often helps us continue to move forward with creating. My inner critic is named Gretchen, you’re welcome to borrow the name as yours as well. While I’m creating often I say, “I got this…you can leave Gretchen.”
When you notice your inner critic getting loud, notice and keep on creating.
Keep in mind that we are not tied to an end product or what the art will look like. It doesn’t matter if you love or hate the work when we are done…because that is not our goal. The goal is to help ground and/or connect and process emotions to help even if in a small way. Many find this particular prompt very cathartic way.
Take breaks if you need to. There is no time frame for when you need to complete any prompt we do in Art Your Grief. You can go at your own pace and there is no right or wrong way to do a prompt.
I encourage creative freedom. If you would like to tweak a prompt to fit your needs or supplies, please do! If you need help with what to use or what might work, please feel free to reach out.
If something surfaces that catches you off guard or feels overwhelming at all, I encourage you to pivot and do something entirely different. You can come back to the prompt later or ditch it completely if it isn’t a good fit. Not all prompts will be a good fit for you, that doesn’t mean it may not be at a later time. (It may be that bringing this work or what came up while creating it, to a therapist may be useful).
If ever a step doesn’t make sense or is unclear, I encourage you to reach out to me. I would love to help in any way that I can.
When you are done creating I encourage you to reflect on how the prompt was for you. How you felt before, during, and after the creating. If this step feels overwhelming, skip it. We are adding to your tool kit of prompts that might be helpful when in a grief heavy moment, or as reoccurring grounding opportunities.
I am not a medical professional nor do I give medical advice. I am teaching from what I have learned through doing this work myself for years as well as teaching it to others in the midst of grief.
Supplies:
For a full list of supplies we typically use in Art Your Grief you can go to the link here, scroll all the way to the bottom of the page linked (to see several lists that meet your needs).
Pencil or Pen
Paper (I used watercolor paper that’s listed on our supply lists in the above link).
Optional materials: marker, acrylic paint pen, crayon, watercolor, etc.
Prompt Guidance:
Check in with yourself. Do you have a general sense of how you are feeling? Here is a feeling wheel I like because it’s colorful and has a range of feelings/emotions. If using a feeling wheel seems daunting you, skip this part it’s not needed. You can write a feeling word or several on a random sheet or on the back of your art, or write it down in your “Art Your Grief Sketchbook” if you have one you don’t need one - some students find it helpful to have to keep all their prompts in one place. If finding feelings is not where you’re at, that’s okay. We are all going to be at different places at different times in our grief. Please skip this and move onto the next step if it doesn’t feel like the right fit for you or it simply feels too tall of an ask to find a feeling word, I’ve been there and I think most grievers have.
Grab a sheet of paper (I used watercolor paper but you don’t need to). I used a 1/4 of a 9” x 12” sheet of watercolor paper. If you’d like to do the same, fold your paper into four equal sections by folding your paper in half twice.
You can use scissors to cut into equal 4 rectangles or tear the paper like I do. If you choose to tear the paper, (tearing can be very cathartic) please wet all seams front and back with water before tearing.
")
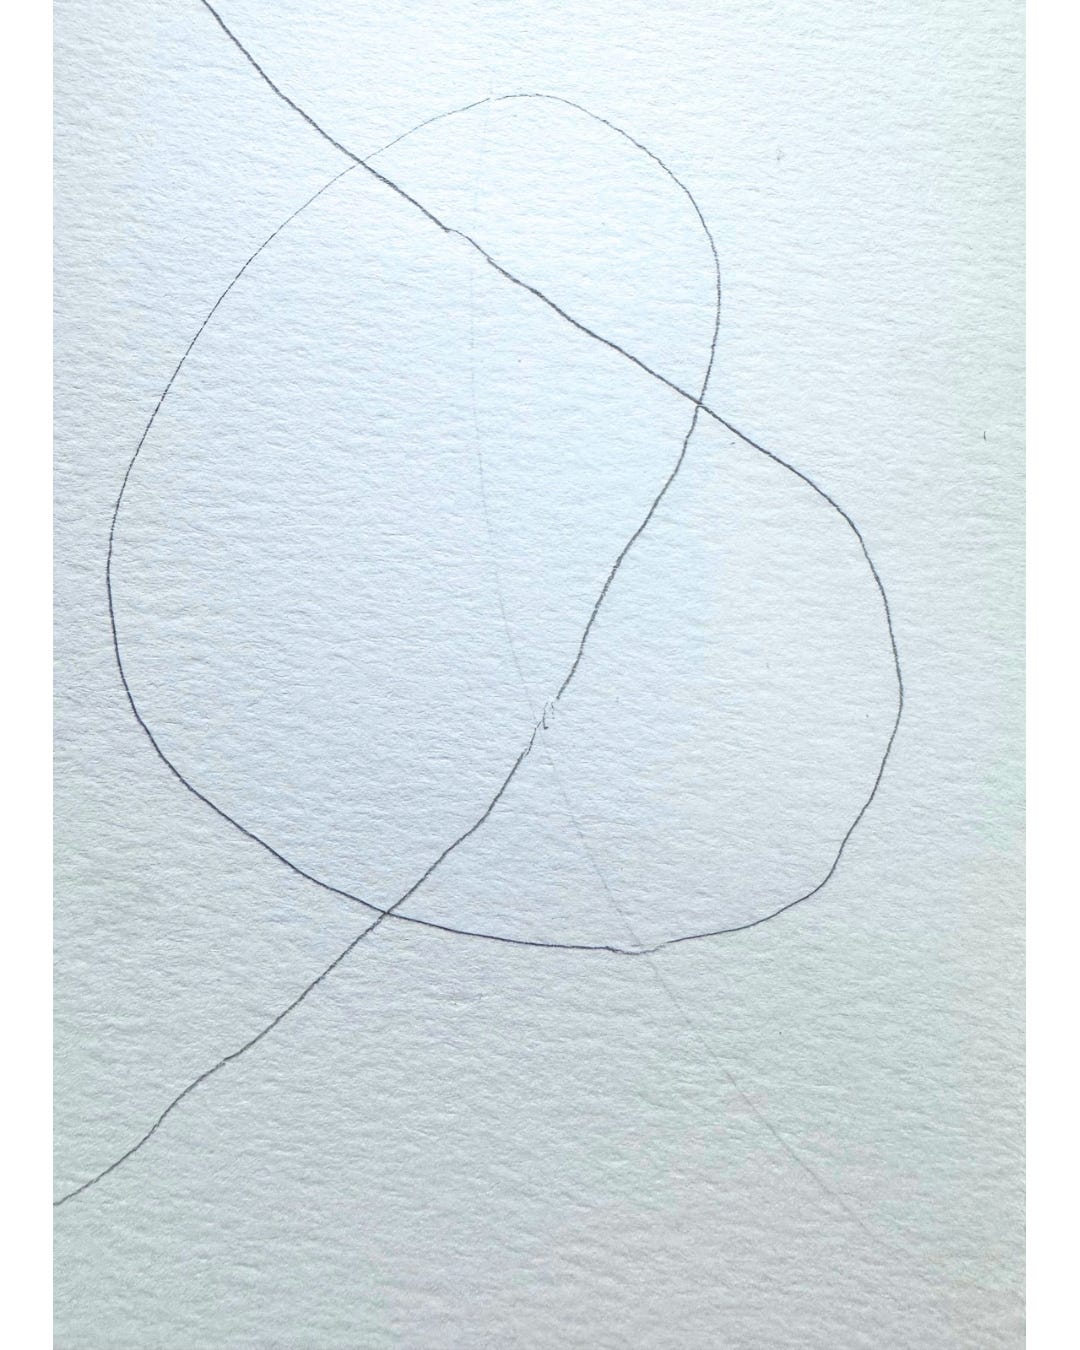
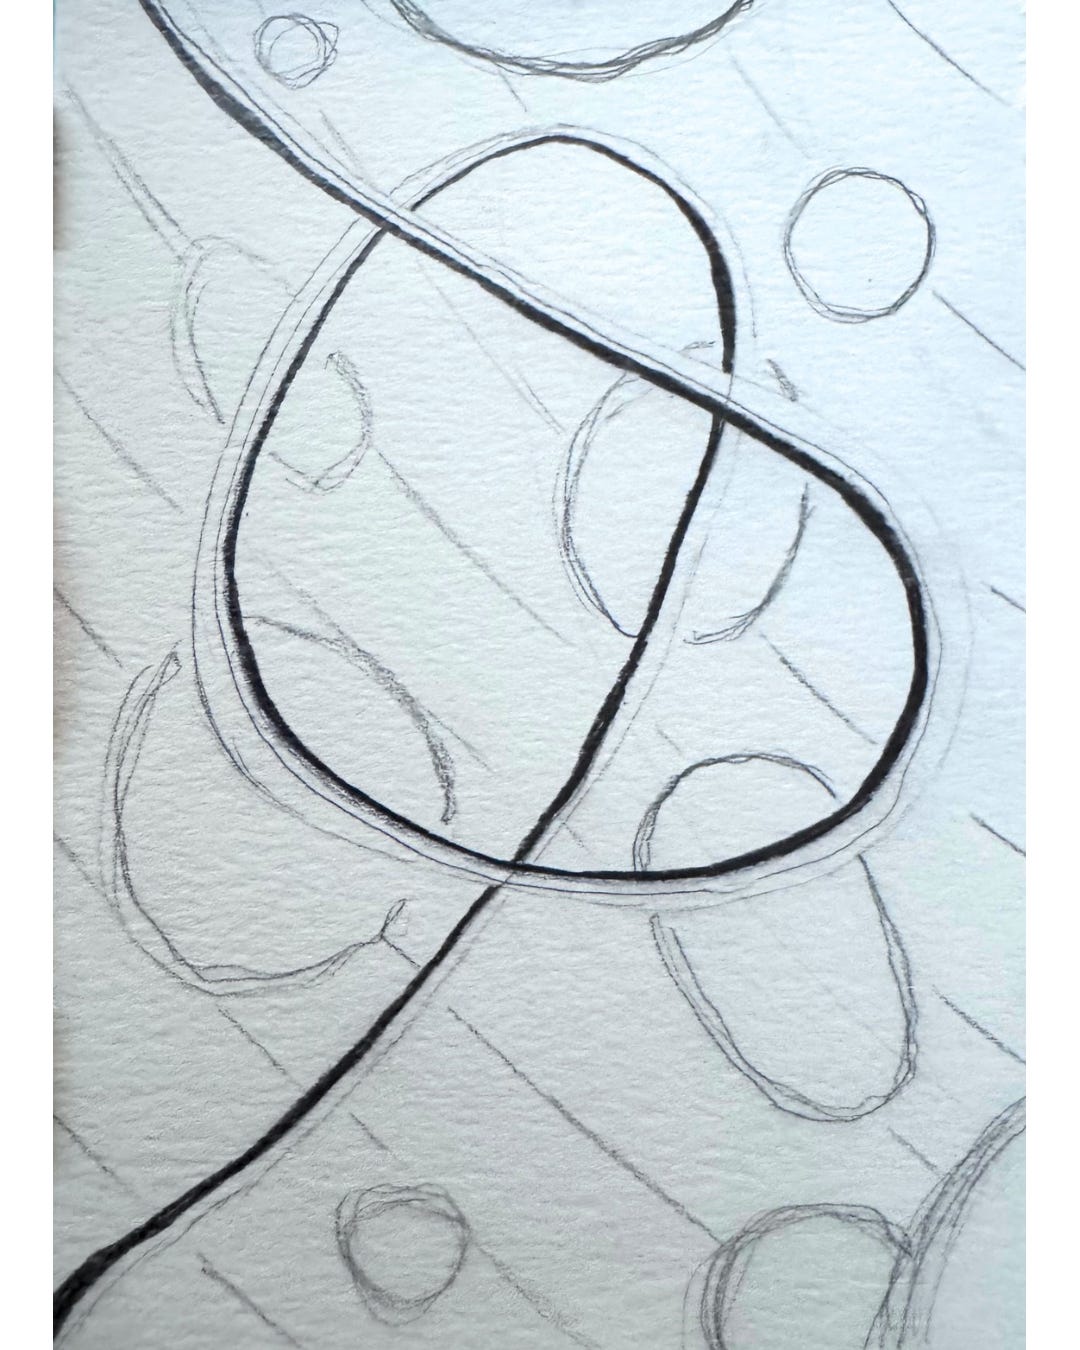
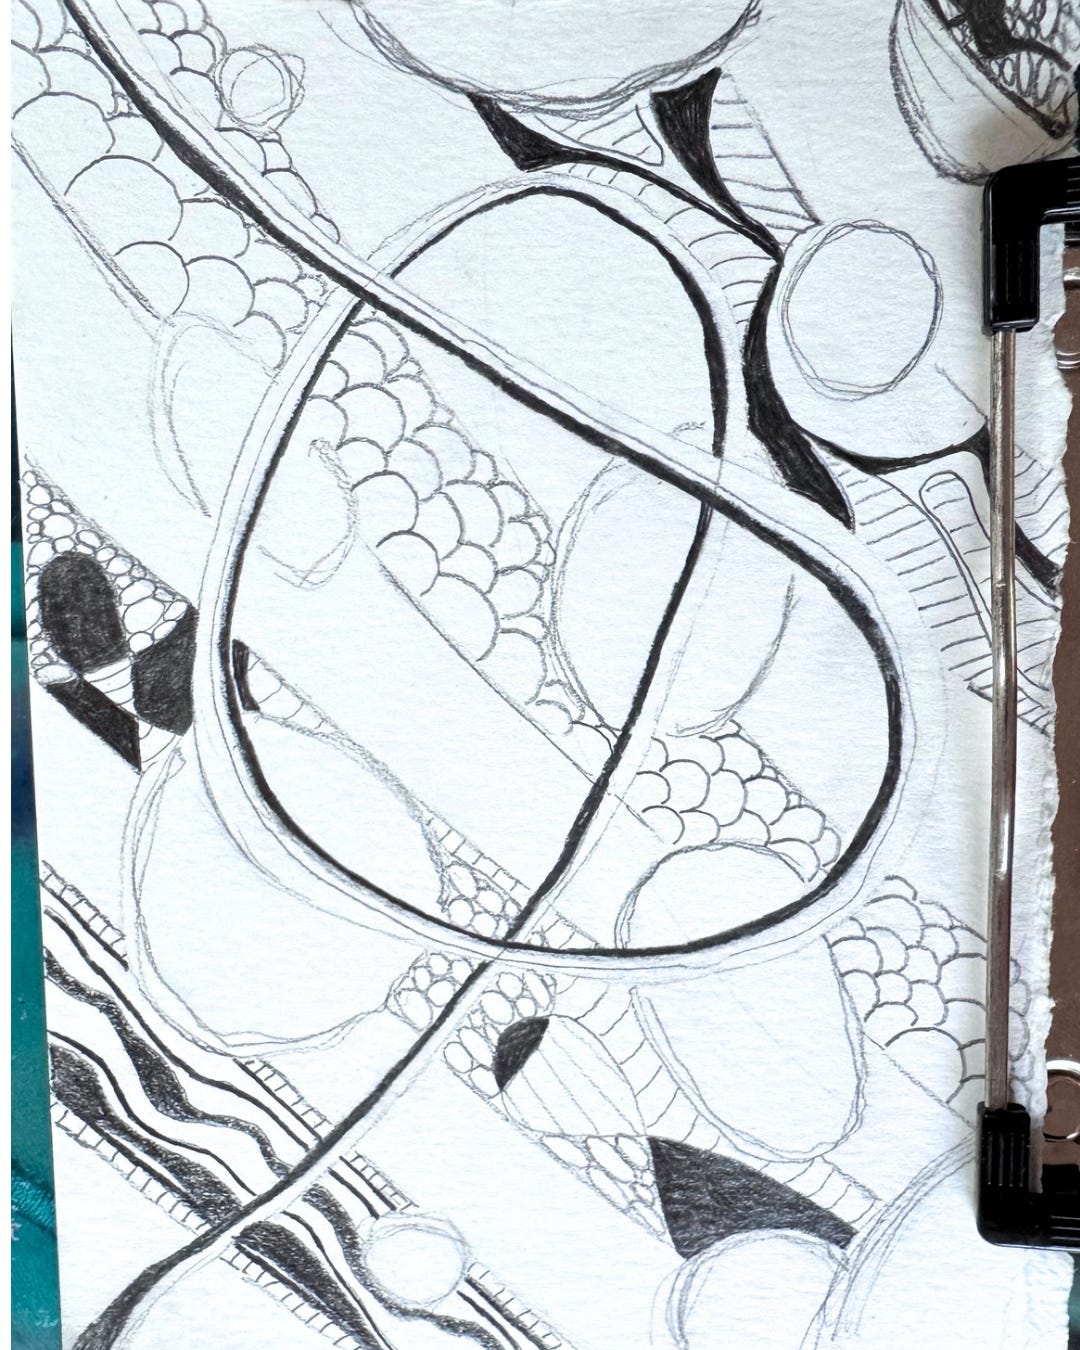
Using a pencil (or pen - nothing fancy I used a random pencil I had laying around) I drew a line that started and ended on two different sides. You are going to do the same. Try not to think too much about it. Yours doesn’t need to look anything like mine, the goal is your own processing so that will likely have a different look than mine. Start on one edge with your pencil or pen and create a line that crosses itself somehow (or a couple times) and ends on another edge of the page. If it seems too stressful to choose what to do, just do something similar to the one below if that is at all helpful for you. Sometimes in grief making decisions feels impossible. If you chose some feeling words in Step 1, you could consider those feeling words as you create your line - for example: is it jagged, straight, curved, sluggish, etc.
This was my first step 4. For this step we are adding some dimension to our lines. As you can see below I wasn’t concerned with an exact straight line or making it the same in every place. Go ahead and with your pen or pencil, make some dimension with your line by following the first line you created. It’s up to you if you’d like to make it thinner or thicker in some places. I didn’t pay attention to that at all, I just went for it. Again, for me the more I think, the more “Gretchen” gets loud about what I’m doing or not doing and sometimes that stops the creation all together. If that’s you too, I’d encourage you to not think about it and just do it.
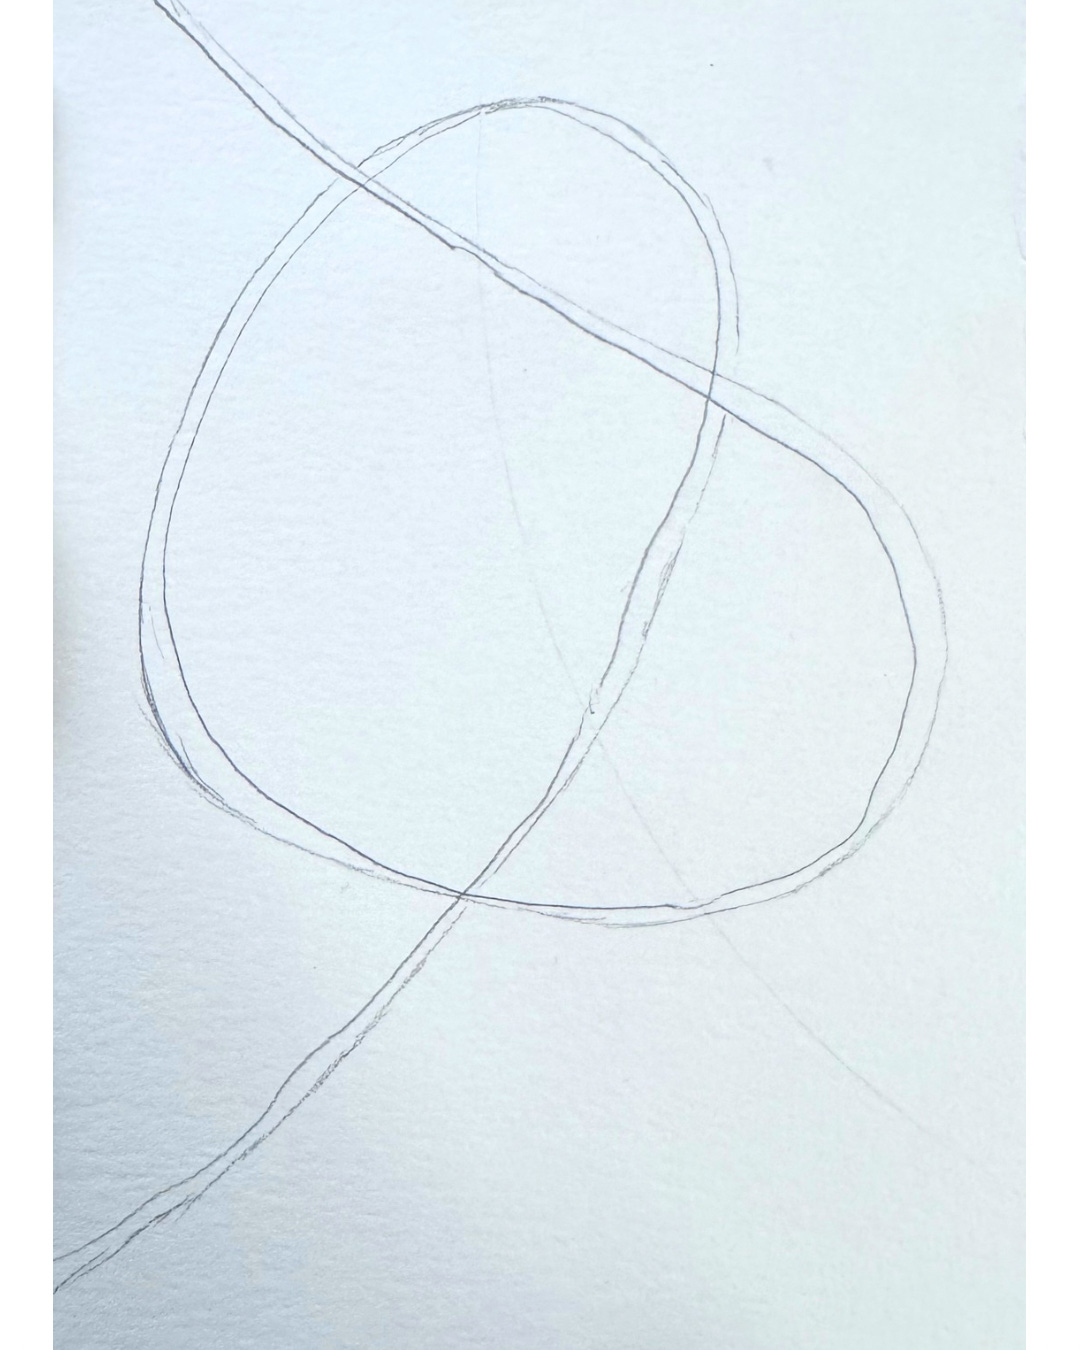
Adding dimension
")


I made a line inside my first line, it’s very thin and trails off. I didn’t have a plan just was playing and doodling. You can add another line inside yours as well if you’d like or leave that part out. This next part you’ll add a darker and area with your pen or pencil. I chose the “bottom” of my line form to do this to make it simple. If you’re not sure where to start, I’d say just choose the bottom of your line too. This is called adding “weight” to our line in art so that we are creating variety with our lines. You don’t at all need to know that but as we go you will pick up on art terms and techniques.
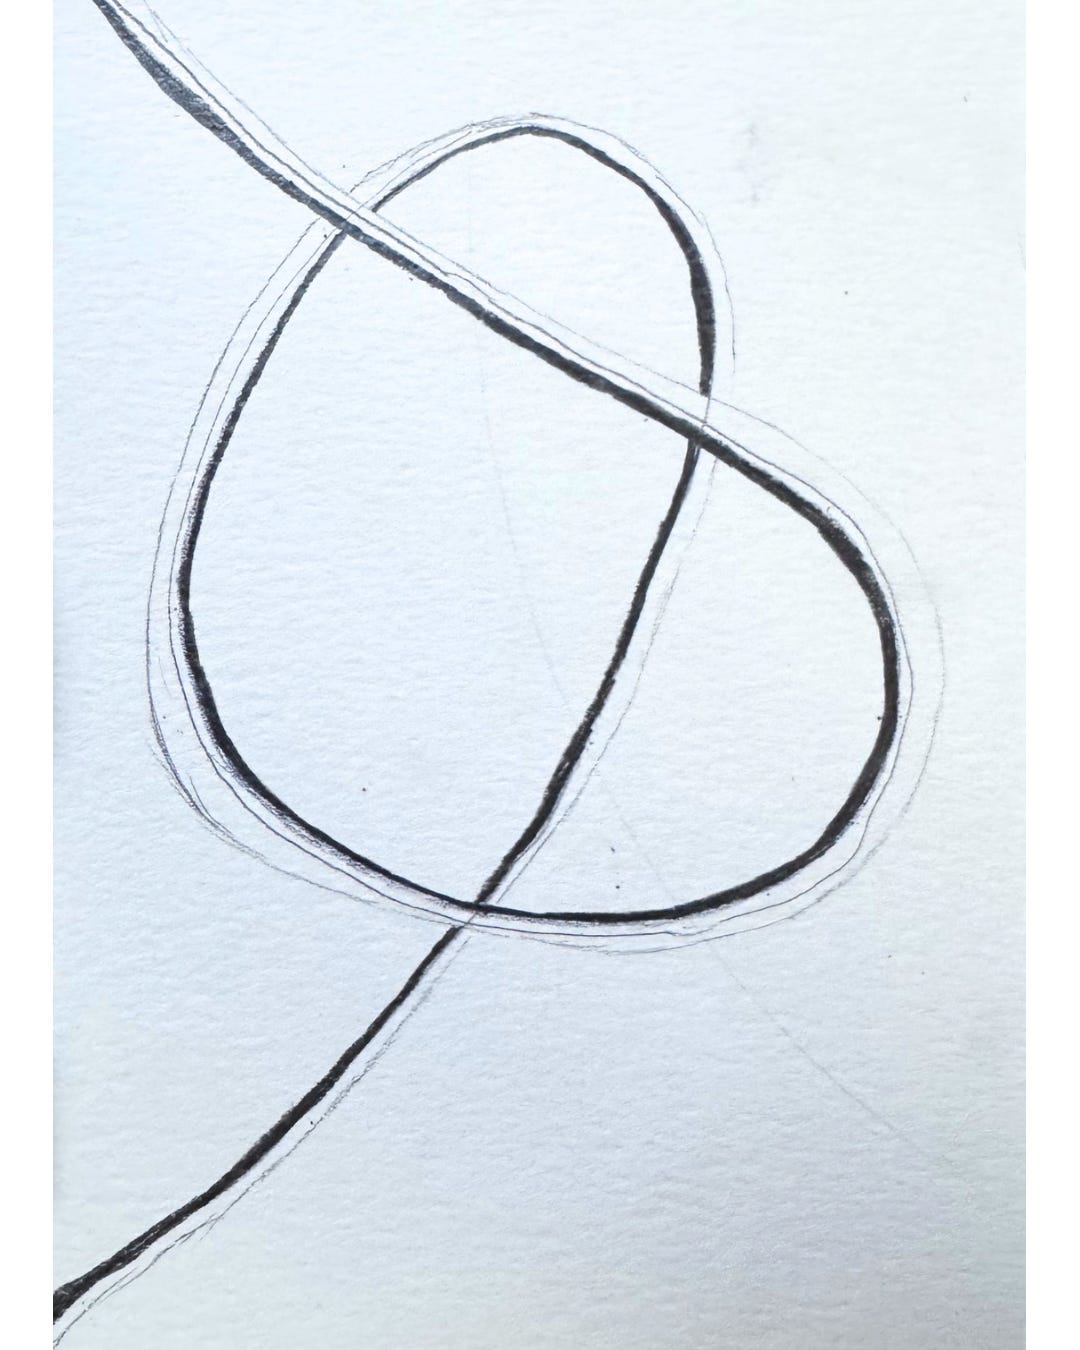
Adding “weight” to our line 6. This step we will be adding a shape to the background behind our line. I chose oval-ish shapes. They are my go to. You can choose whatever you’d like. The more precise the shape the harder it is to re-create it, for example a rectangle or triangle. That’s not to say don’t do those, just know that that could be tricky if you want them to be straight. That’s why I choose wobbly forms, again, my “Gretchen” has less to say about wobbly forms. Once you choose your shape, add in large, medium, and small versions of this shape in the background. Notice mine look a little rough or “hairy”, that’s how I don’t fully commit. You can try that too, I find it easier to do than a definite line. You can clean it up later if it bothers you. I cleaned mine up later in the process.
Creating shapes in the background


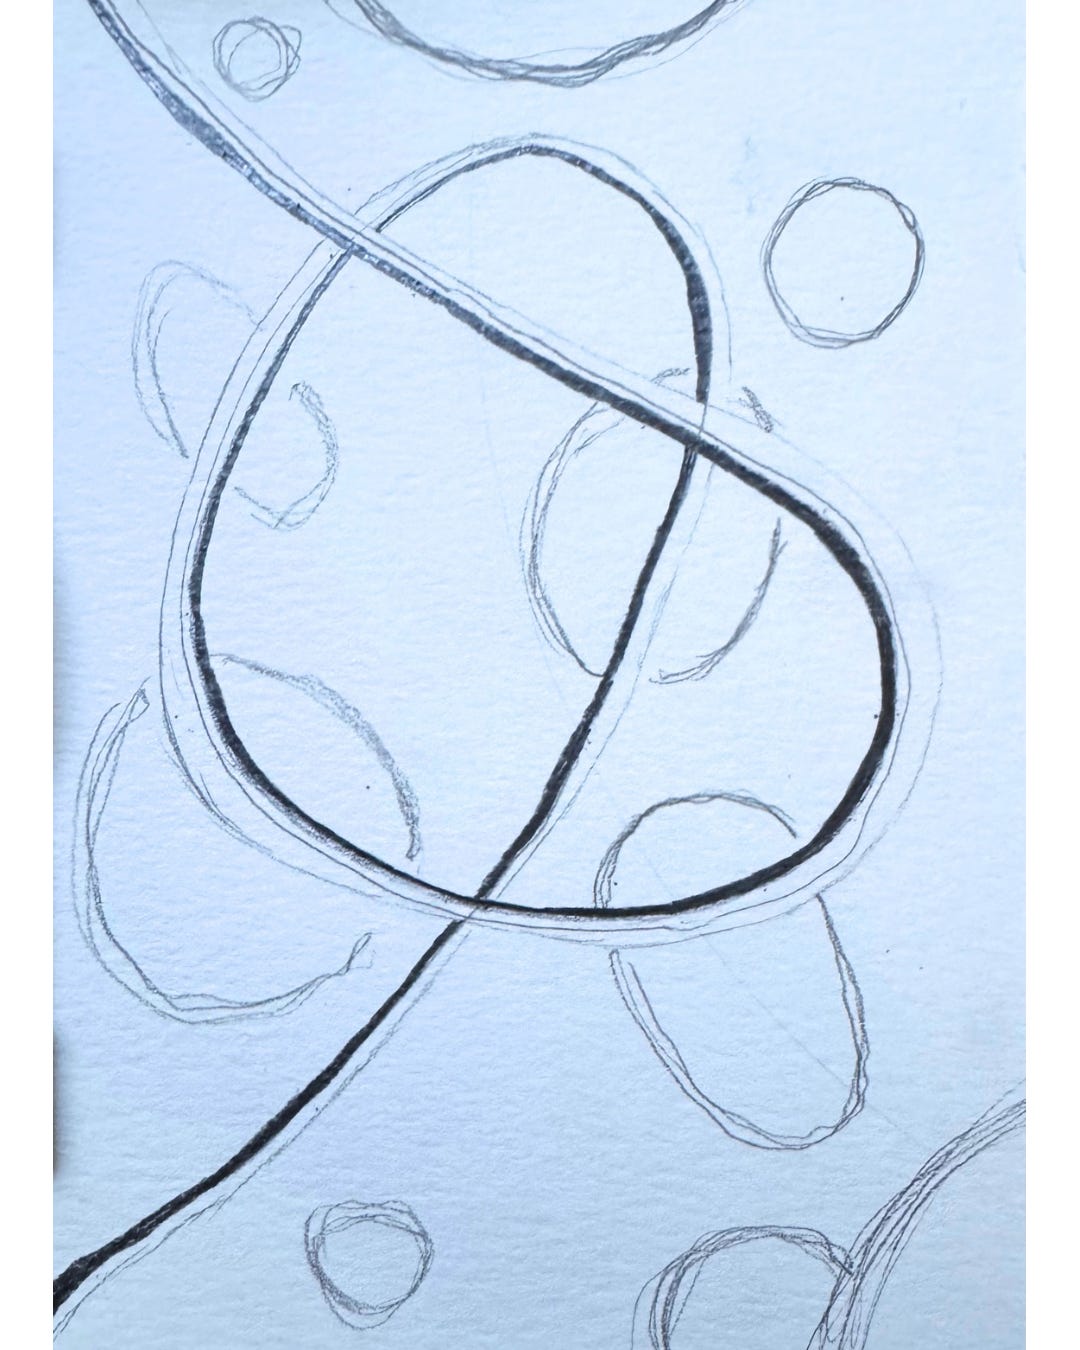
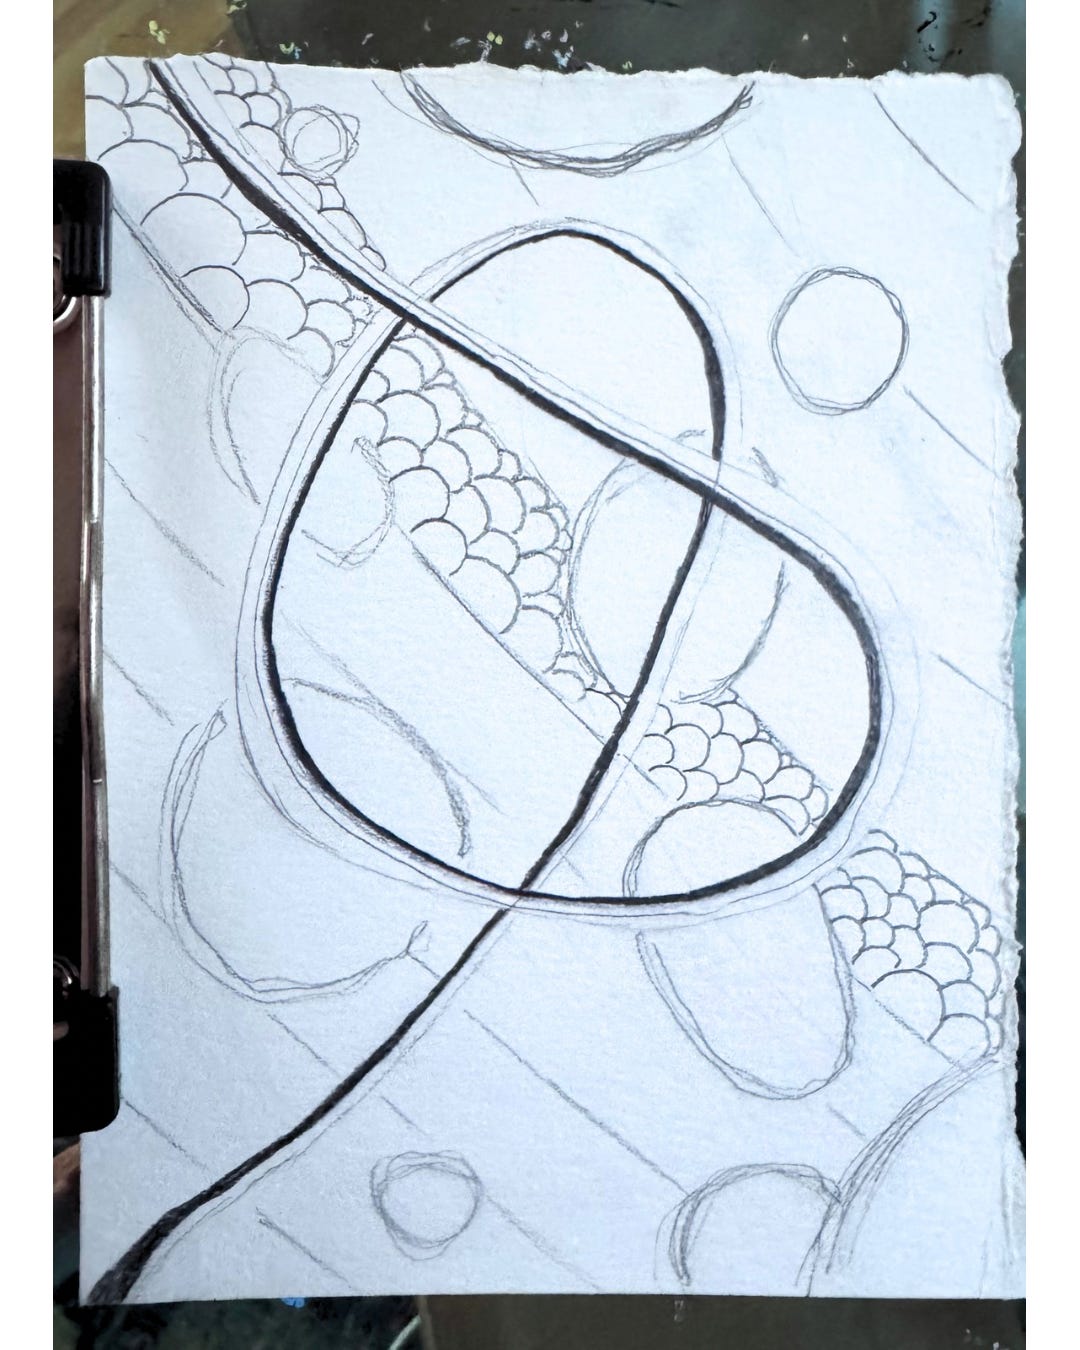
For this step we are adding in repeated forms in the background. I chose to make thick strips or lines in the background. We will be adding details within them, so whatever you choose make them large enough to do some doodling in. Again if you’re stuck and not sure what to do go ahead and try what I did. Remember there are no rules really, you can do your own thing at any time. With this addition we now have a foreground (our line), middle ground (repeated shape) , and background (repeated strips or lines or something else).
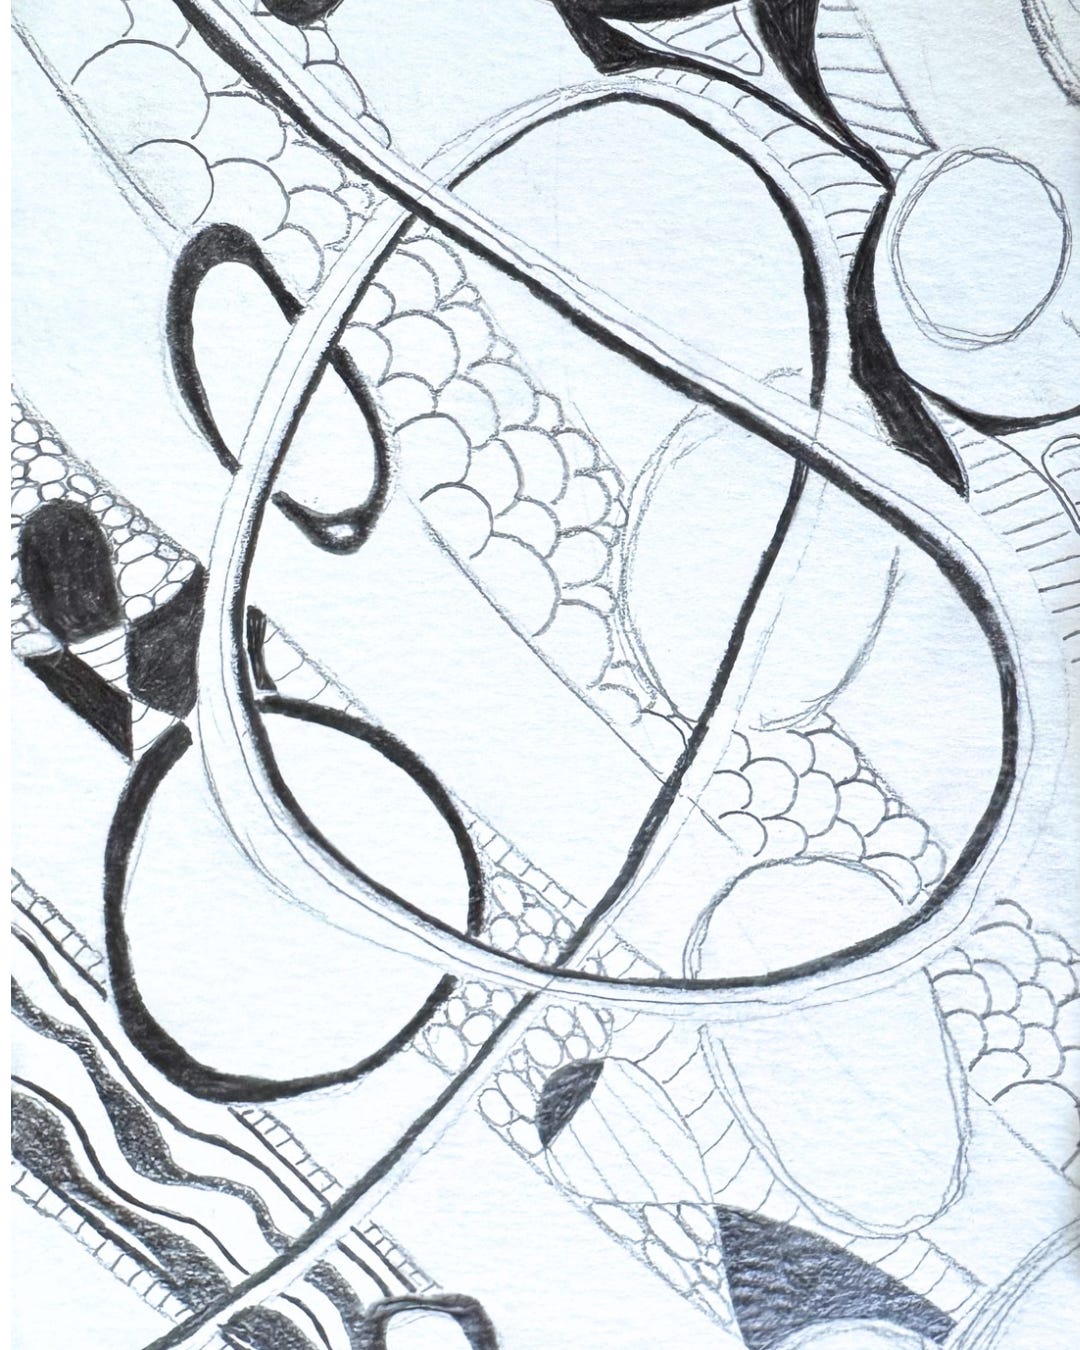
Added thick lines in the background 8. With this step, we will be filling in one of those strips or lines (or other form you chose) in the background with doodles. I wanted to make little half ovals that looked a little like scales. With my pencil I added those in. Late I broke the border of my strip because I liked that look, so you can switch it up at any time.
Adding doodles to our background


Here we added in more doodles inside another strip or line in our background. I played around with line and made different sections and in each area and either filled it in with dark pencil completely, or added lines, or left it empty with an outline.
Adding in more doodles 10. I added in some curvy lines to split up one of the strips at the bottom and will then fill it in with different doodles.
Added in a curvy line inside one of the other strips


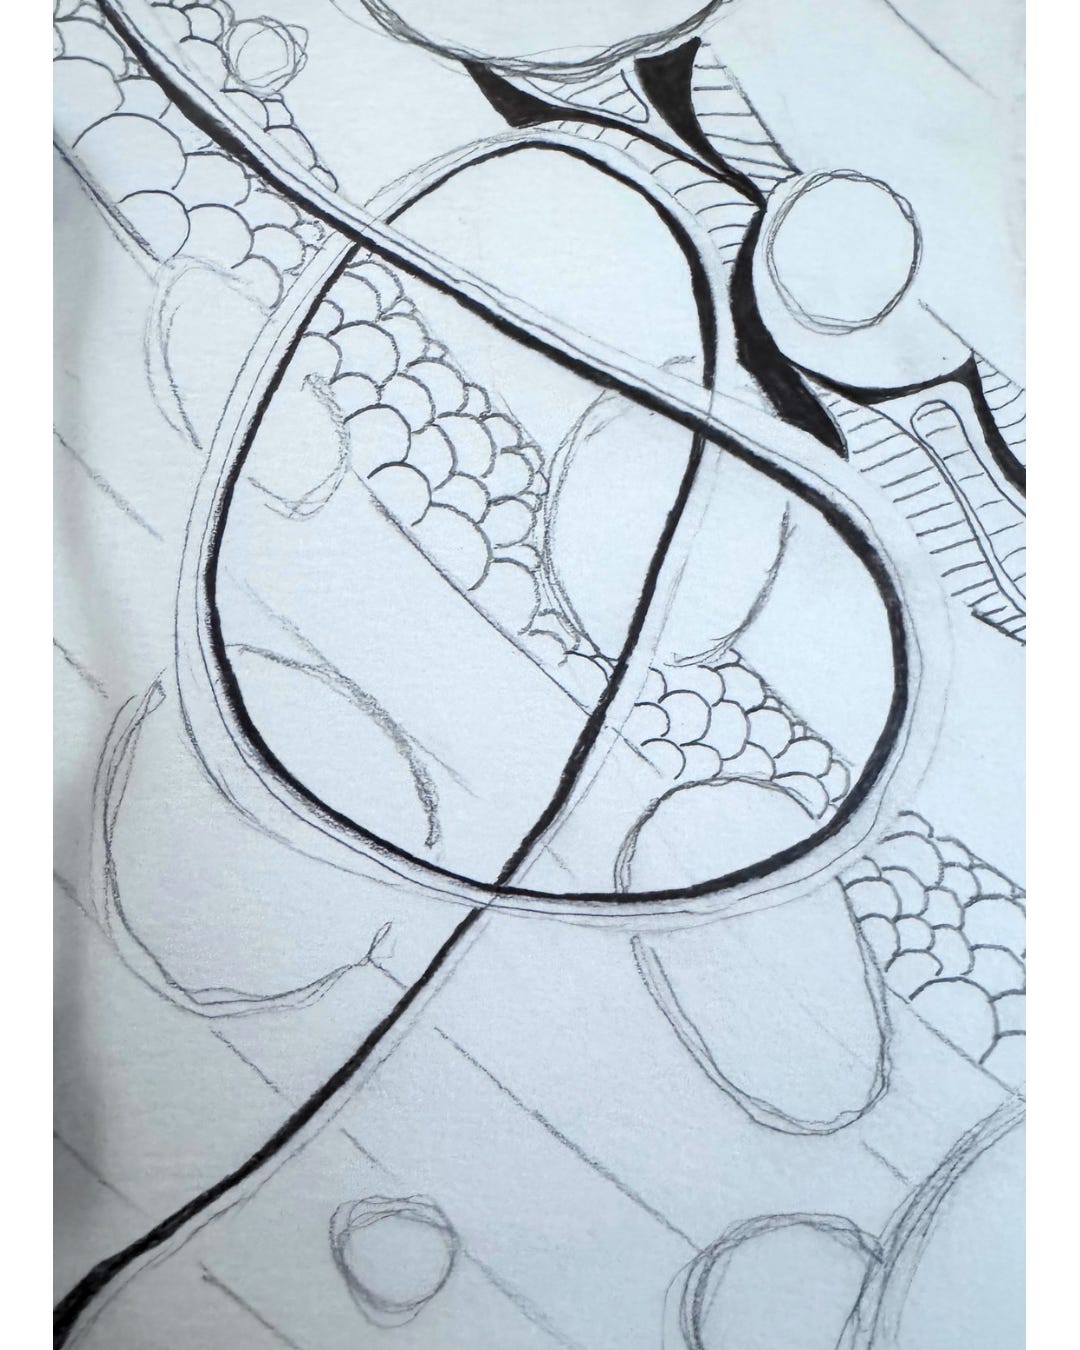
Here I added in dark areas with my pencil, oval-ish shapes, and lines. You can fill yours in any way you’d like. You could make them all the same if you wanted.

Here I added squiggly lines to the bottom strip and filled in some of them with pencil and some I made some lines. Feel free to just try different things and whatever feels like the best fit for you. You’re welcome to try anything you’d like and you can try something I’ve done too.
12. Now that the strips in the background are all filled in, we are going to darken the outsides of our shapes. I used pencil to do this. This is where I cleaned up my “hairy/sketchy” looking shapes. There were a few places I didn’t like, that I added some ovals on top of and filled them in with pencil. You can do this too or fill yours in completely, whatever you’d like. I wanted to make only outlines on mine that were quite thick so they would show up.


This last part I added a bit of color using a marker inside my oval-ish shapes. I filled some in and put a outline on one of them (top right).
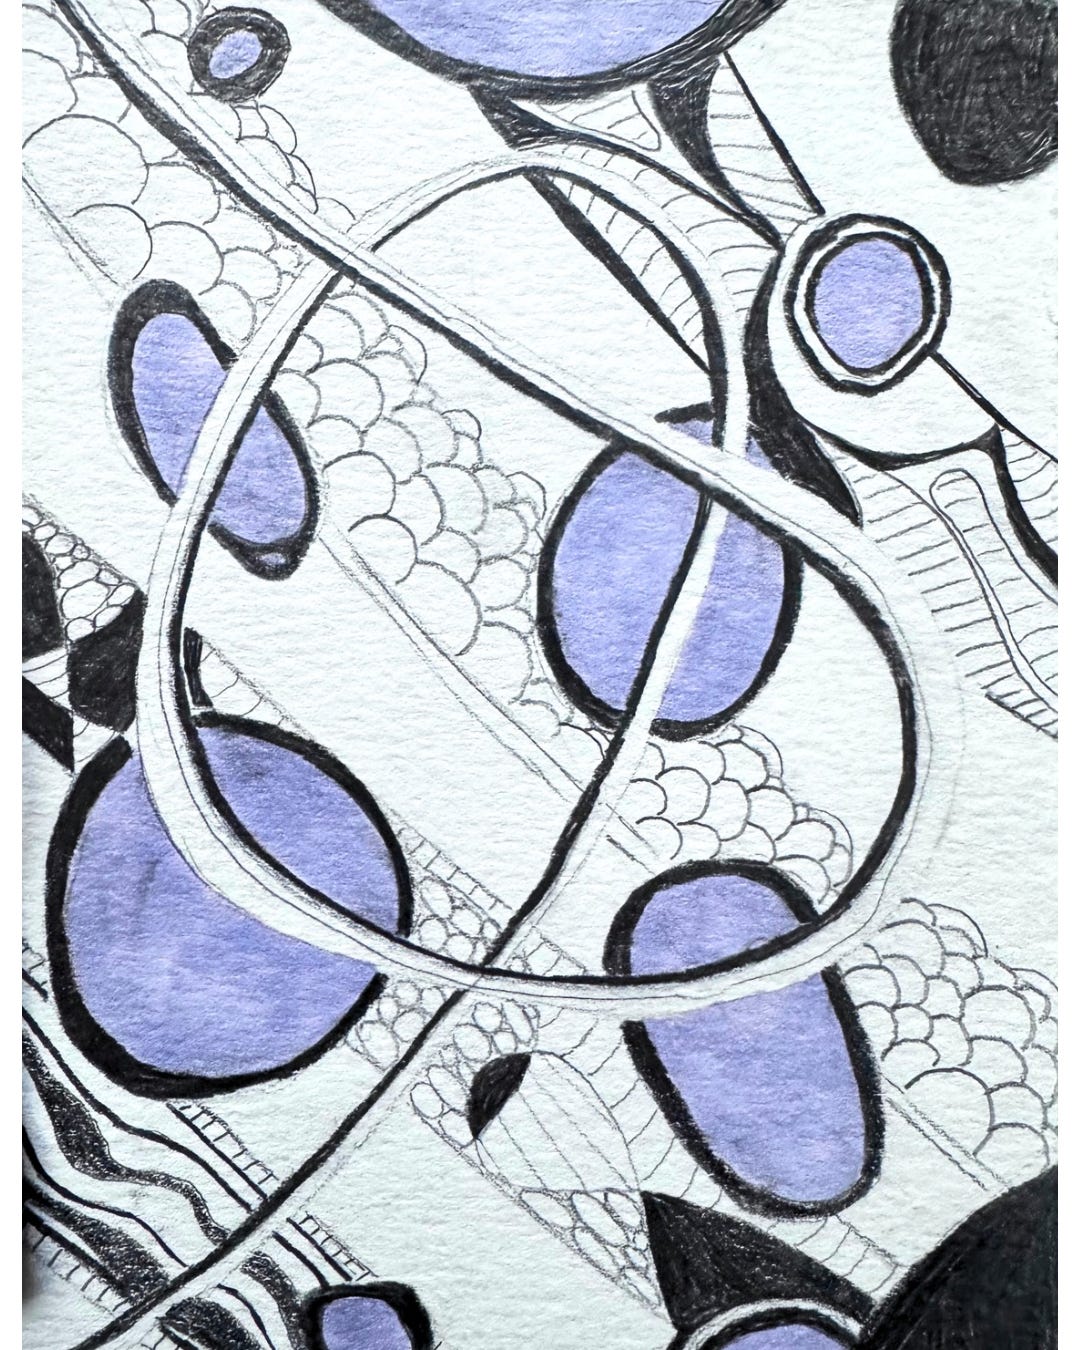
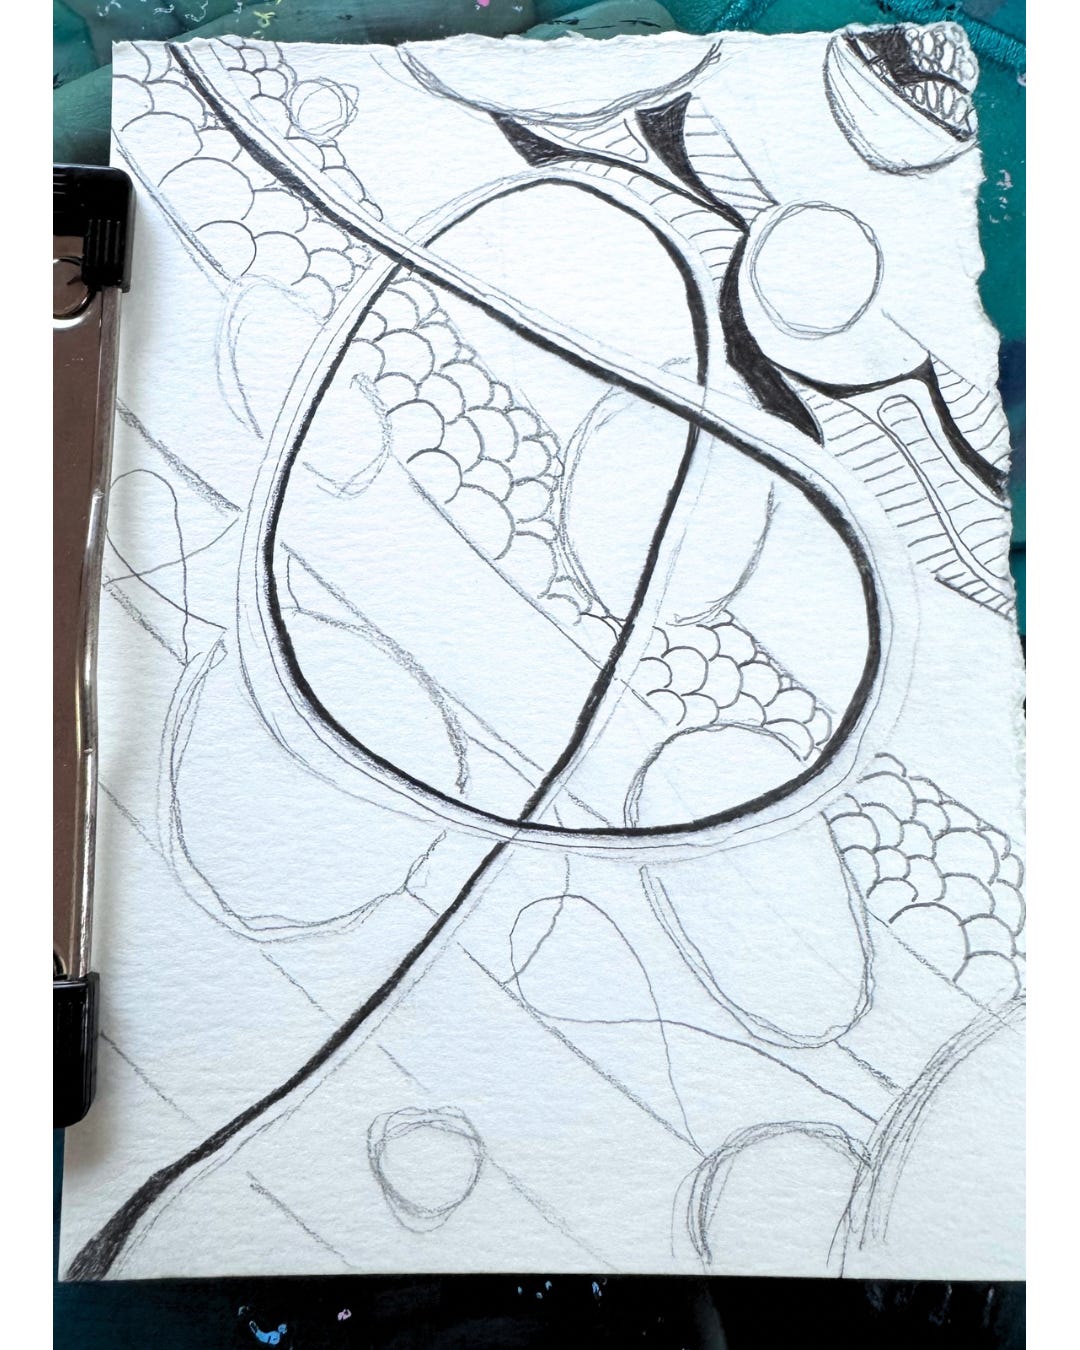
If you want to take this even further you could for sure add even more doodles or add in some value or shading. If you take a peek at the image below, this one I worked on for weeks as something I just came back to over and over again. I wanted to make what was below shapes look shaded so that whatever was on top would look more three dimensional. For me that was fun. I used scribble, dots, hatching lines, etc. to create some shading. You could use a pencil gently just to give it a little shading and see what you think, if it at all stresses you out - skip this and don’t worry about it. I didn’t touch shading at all with the upper image.

Consider some reflection and writing. Consider how you felt before, during and after this prompt? Was it helpful? Difficult? Do you think you’ll come back to this one?
Please be gentle with yourself as you move through the rest of the day as things may feel tender. Consider doing something that will be helpful for you to do, talk to a friend, take a shower, go for a walk, whatever you think might be holding if needed. Thank you for doing this work with me. I’d love to hear how this prompt was for you.


Thank you for the reminder of just how therapeutic doodle art can be for processing big feelings, and indeed for mental health and mental wellbeing. Having creative outlets has always been a way for me to unwind, free my mind of ruminating thoughts, and cultivate peace of mind.
This prompt is creative and gets others to keep themselves grounded.